8” x 10” Ultra-thin 12 mil Adhesive Magnetic Peel & Stick Magnet Sheets
8” x 10” Ultra-thin 12 mil Adhesive Magnetic Peel & Stick Magnet Sheets
Couldn't load pickup availability
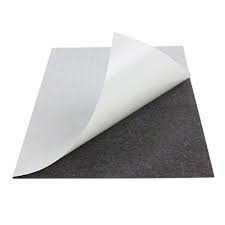
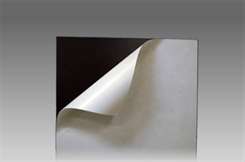
Each adhesive magnet sheet is 8” x 10” and an Ultra-thin 12 mil in thickness. Our 12 mil adhesive magnet can easily be cut with a sharp pair of scissors or a tabletop paper cutter.
Remove the paper liner to reveal a strong indoor adhesive perfect for attaching photos, graphics or crafts.
We sell only 100% American Made products at Magnet Valley so you know you are receiving a high quality product! Your shipping choices and pricing are shown to you after you enter your shipping information but before you enter any payment information.
Using a sheet of adhesive magnet is relatively straightforward. Here's a step-by-step guide on how to use it effectively:
-
Prepare the surface: Ensure that the surface where you plan to apply the adhesive magnet is clean, dry, and free from dust or debris. This will ensure better adhesion.
-
Measure and cut: Determine the size and shape you need for your project. Measure and mark the desired dimensions on the adhesive magnet sheet. Use a ruler and a sharp utility knife or scissors to cut along the marked lines. Be cautious and use proper tools to avoid injury.
-
Peel off the backing: Once the desired shape is cut, peel off the backing paper from the adhesive side of the magnet sheet. Start peeling from one corner or edge to expose the sticky side.
-
Position and apply: Carefully place the adhesive side of the magnet sheet onto the intended surface. Press firmly to ensure good contact and adhesion. Smooth out any air bubbles or wrinkles by applying pressure from the center and working your way outwards.
-
Allow for bonding: After applying the adhesive magnet, allow it to bond with the surface for the recommended duration mentioned on the packaging. This will ensure a strong and long-lasting bond.
-
Test the magnetism: Once the adhesive magnet is fully bonded, test its magnetic strength by placing lightweight objects or magnets onto it. Ensure that it holds securely without slipping or falling off.
-
Arrange and decorate: Depending on your project, you can now arrange and decorate the adhesive magnet as desired. Attach items like photos, notes, or decorations using additional magnets or magnetic clips.
Remember to consider the weight and thickness of the adhesive magnet when applying it to different surfaces. Thicker magnets may have a stronger hold and work better on flat and smooth surfaces. Always follow the manufacturer's instructions and recommendations for the specific adhesive magnet you're using.

